
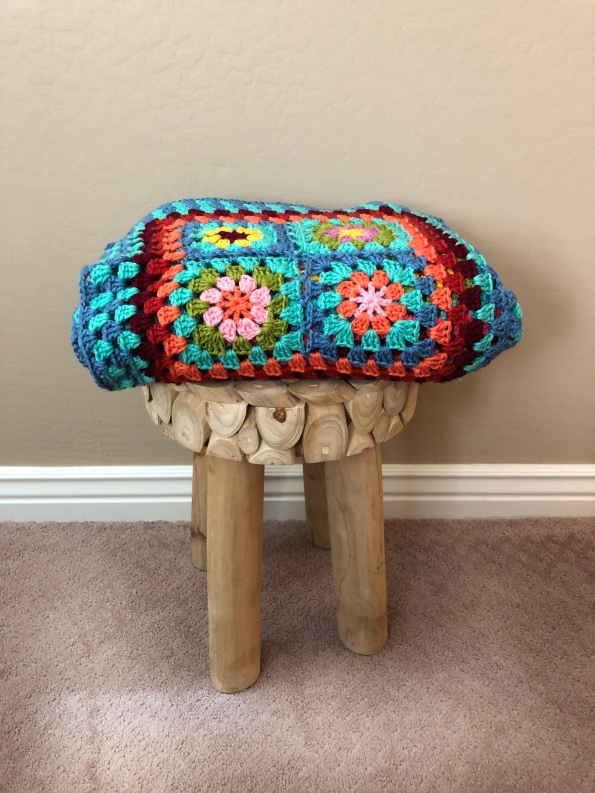
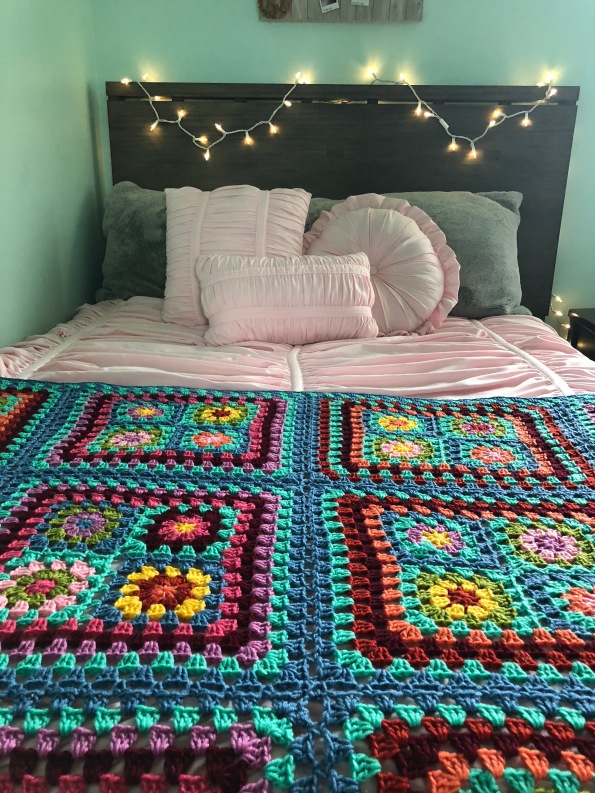
I made this crochet throw from Brava worsted yarn I purchased from Knitpicks.com. It is a traditional square with flower center. I grouped 4 squares into quads, and crocheted all around 4 times in different colors before joining. The whole blanket was joined as I went. As you can see, I used plenty of colors.
I have no pattern for this blanket, but if anyone wants to create something like it or has any questions about what I did, I will be happy to answer. It was very simple, even beginner level.
I got this idea off of Pinterest. Somewhere there is a pin on there that looks similar to this layout, but the pin did not link to any particular pattern.
I selected two main colors, that being Denim and Tranquility, 4 -100 gram balls of each color. Then I bought 2 of the dark plum color since I used it to go around each square. For the rest of the colors, I bought 1 each. I used Avocado around 2 of the flowers in the middle of each square, and Tranquility for the other two within each square, to try and be consistent.
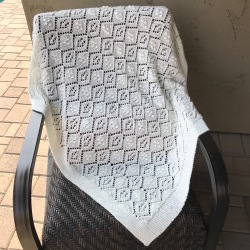

 This blanket will be wrapped as a gift tonight, and for memory’s sake I want to say a few words: I have taken this blanket out of the drawer countless times to squish it and hug it. It is the softest baby blanket, and I believe, the prettiest I’ve made.
To make sure it was extra soft, I washed and dried it, then washed it again, soaking it with some good smelling conditioner (Suave Cherry Blossom) in the washer before giving its final wash. I bought the Suave for this purpose, and in this fragrance, suggested from reviews I read on line, and made this acrylic blanket without a squeak in sight. Pure Bliss.
The yarn is sport thickness, which I strongly suggest for a lighter style blanket. The size is a tad bit bigger than a standard Receiving Blanket. Not on purpose, but it is just right. Bernat Baby Sport in Antique White Big Ball.
Here is the Receiving Blanket pattern if someone runs across this blog and likes it enough to make it. The yarn was under $7.00 with a coupon and just needed the one big ball with some left over. Softens up like a dream if you do it right. If you can’t open Ravelry links because you are not a member, send me your email address and I will email you a copy. I put this pattern on there about a month ago, and just one person so far has decided to actually start making it. Maybe there are so many other beautiful ones to choose from this one is but one of thousands.
Presently as far as I know, the recipient is getting a one of a kind!
Rosey Snap Purse
By Lynn Christensen (Lyndieloop)

I’ve had this pattern for awhile, and thought some people might enjoy trying to make it, or to use it to inspire your own thing.
Look at the photos, and your frame, and go for it. Feel free to ask me any questions or to clarify what I have written, and I will do my best!
I hand sewed the lining. Use YouTube for tips to learning anything you aren’t familiar with. If you are new to crochet or hand sewing, You can do it with some patience.
Materials
KINGSO Retro Metal Frame (Amazon Prime)
* Color: Bronze, Dimensions: Diameter 8.5cm/3.3inch
Yarn – cotton or cotton mix yarn weight 3 (Sport weight)
(I used Hobby Lobby Omega Sinfonia Mercerized Cotton Light in 824 Burgundy)
Material for lining
Needle and thread, pins, Scissors, fabric glue (optional)
Crochet Hook size 3.5 mm
Special terms
Dec = decrease
Pm = place marker
Lm = left marker
Rm = right marker
Cm = center marker
Sk1 = skip 1
Instructions

With yarn and 3.5mm hook, Ch3, sl st in first ch, ch 1
Sc 6 in center, sl st in 6th sc, ch 1
Sc1 in same sc, sc2 in next 5 scs (12 sts)
Place marker (pm) at beginning stitch, and always replace it at each new row. I use a piece of yarn as my marker (m).
Work in spiral around and around as follows:
*Sc1 in first sc, sc2 in the next sc*, repeat from * to * 5 more times (18 sts);
*Sc 2, sc2 in the next sc*, repeat from * to * 5 more times (24 sts);
*Sc 3, sc2 in the next sc*, repeat from * to * 5 more times (30 sts);
*Sc 4, sc2 in the next sc*, repeat from * to * 5 more times (36 sts);
*Sc 5, sc2 in the next sc*, repeat from * to * 5 more times (42 sts);
*Sc 6, sc2 in the next sc*, repeat from * to * 5 more times (48 sts);
Sc for 3 rounds without increase or decrease (48 sts)
Count 11 to left, pm
Count 12 to right, pm
3 decrease rounds as follows:
Sc to first m dec1, sc to next m dec1, sc to end (46 sts);
Reposition markers as count 11 to left and count 11 to right
Sc to first m dec1, sc to next m dec1, sc to end (44 sts);
Reposition markers as count 10 to left and count 11 to right
Sc to first m dec1, sc to next m dec1, sc to end (42 sts);
Reposition markers as count 9 to left and count 10 to right
Rows will be worked from here; no more rounds, no chain 1 at turn rows. Goal from here is to decrease on each side, one at a time so that the work will fit nicely in the frame.
Markers from here will be called lm (left marker), cm (center marker) and rm (right marker). Their names do not change no matter which side of the row you are working.
Sc to left marker (lm), turn;
***
Sk1, sc to rm, turn;
Sk1, sc to lm, turn;
Keep up these decreases until there are 4 sts to the left of cm and 5 to the right of cm. Sl st and tie off.
***
Repeat what you just did for the other side. Find your center and make a new cm. There should be 11 at left and 10 at right. Place lm and rm.
Join yarn at new rm. sc to lm, turn;
Repeat from *** to ***
Weave in all ends.
~~~~~~~~~
Roses
Sizing – Groups of 5 ch plus 3
Leaving a 6 inch beginning tail, Ch 18, dc2 in 3rd ch from hook, *ch 1, skip 1 ch, dc3 in next ch, repeat from * to end; ch 2, turn;
Dc in the first dc, dc2 in the next dc, dc1 in the next dc, ch2, sc in the chain space, ch2,
*Dc in the next dc, dc2 in the next dc, dc1 in the next dc, ch2, sc in the chain space, ch2, dc in the next dc, dc2 in the next dc, repeat from * to end, tie off, leaving 6 inch end tail.
Thread the beginning tail with tapestry needle, and weave in an out of the beginning chain until the beginning and end tails meet. Tie them together in a knot, and thread through the coin purse.
To position them on the purse it helps to stuff it so you can see how they will look when the purse is finished.
~~~~~~~~~~~~~~


Put The Lining In
Lining – cotton fabric makes very nice lining; however this time I used some shimmery fabric I had. It was nice that it didn’t fray like cotton. If I use cotton I double it over around the top and sides, and sew a seam to keep the fray at bay. The top all gets tucked under the frame. You can also use some Fray Check Liquid instead, which is easier than sewing
Using a small bowl, I made a pattern out of paper, but I have drawn right on the fabric in the past which works great. This fabric was hard to draw on, and for instructional purposes this is easier to show dimensions.


Fold fabric, right sides together, sew along the purple line. Flip the crochet purse inside out, and sew the lining, whip stitching around the top.
Sew In The Frame
The easiest way would be to glue it in first with fabric glue before stitching around. You don’t have to do that step, but if you do, it will be a lot easier not to have to worry about getting it in there right.
I’ve learned the tidiest way to sew around the frame is to pick a side. Pull a double thread from back through the front center hole, leaving a tail of thread to tie off later. Weave in and out going from center to left, the come back to the center, then weave all the way to the right, then back to the center. Cut the thread and tie the threads in the center together 3 times, and stuff the knot up in out of sight. Do the same for other side.

I hope you ended up with something you can feel proud of, and I hope you found this project enjoyable!
 Let me start by saying this wasn’t hard if you know how to knit in the round. I learned to knit in the round by watching YouTube.
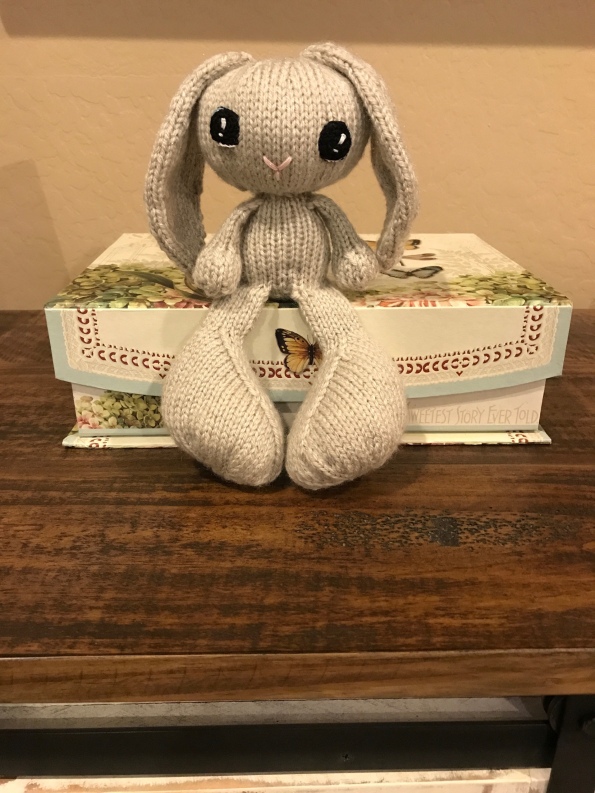
This little guy took 5 days off and on to make. I enjoy knitting or crocheting things with techniques new to me, and while I have made several stuffed softies, this one has no seaming at all. It is done in the round with the legs, arms, tail, ears all knitted in as you go. The body and head are one piece, no sewing on the head. The head is sturdy, no wobble.
I tried my hand at crocheted eyes. This is just two offset circles in black and blue with an embroidered shine in the middle. This is something I can see getting better at. There are lots of crocheted eyes to view on Pinterest that the experts have done. Ever searched Amigurami on there? It would take a few weeks just to finish the detail on one shoe for some of those Ami dolls! They took it up a notch with some of those creations. Maybe 10 notches!
Bonbon here, is the perfect size for a baby; not too big to hold. Used Worsted weight and 3.75 needles.
The pattern is Bonbon by Susan Claudino if anyone wants to give it a try.
My sister, Karen, made these for me. Whenever I am knitting, and run across them, it makes me feel happy. That is all I had to say today. Just feeling happy thoughts for those I love.


I wanted a medium sized pack for my back that wasn’t too big or small, and would expand, was comfortable on the shoulders, and of course hand made. This is not a huge back sack like it looks. To me, it is the perfect size and sits nicely between the shoulder blades without feeling too heavy.
I made a Free pattern for it. If you can’t open it and you want it, I will email it to you.
Chevron Bag
It is a chevron bag with some of the Chrevron rows using a long double crochet to rows beneath in order to add some texture and uniqueness.
This pack will look cute with a little in it or a lot. In this photo it has some yarn in it to fluff it out a bit.

Here it is stuffed with a few sweatshirts on top of the yarn to fill it up more. It could even hold more if you wanted.

See the back? Since it isn’t fill up, it will just lay against you.

When it is full, the back of the pack looks like this. The bottom is now truly on the bottom. I added a few sweatshirts to it to fluff it out more:

Have you ever had a project you stuffed away because you got tired of it? This was it for me. There is something about granny squares I find endless, and I tend to give up from just getting tired of doing the same thing.
As a result, I stuffed the squares away in a drawer, unfinished for 3 years. I didn’t feel like whip stitching it all together. Every time I would open the drawer and see it in there I would feel the burden of an unfinished project where I spent all that money on yarn, and where I couldn’t remember which hook size I used. Well, I finally pulled it out and finished it up just for the sake of it. I used Shine Sport by Knitpicks, for anyone who wonders. The yarn is soft, and pretty.
This is a free granny square found which a lot of you are probably familiar with. It is the Sunny Spread free pattern.
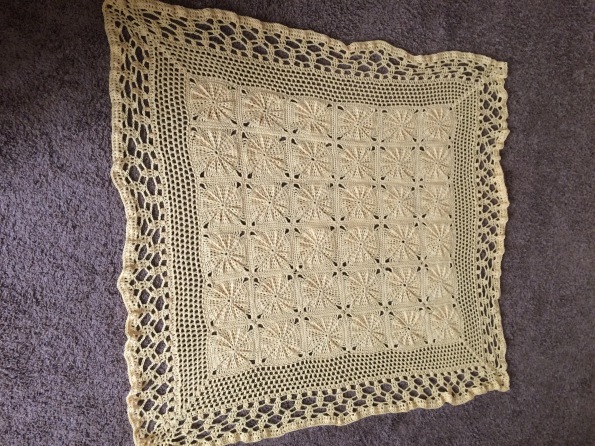
I’m pleased with how it turned out. The border is supposed to look like interlocking rings. Don’t ask where I found that. I have long since lost it, and it has gone far, far away.
I highly suggest the square, especially if you want a more solid look to your blanket.

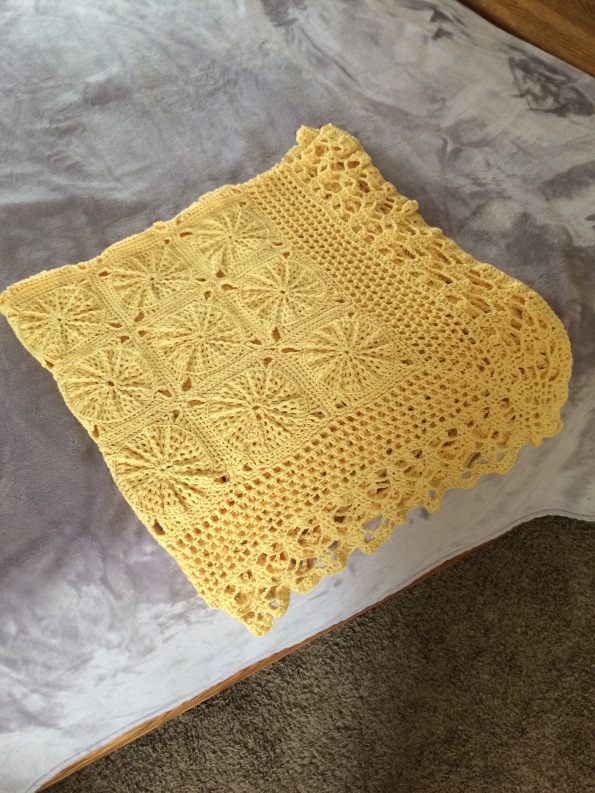
The photo below is kind of an ugly photo, but I am including it so you can see the border, which I thought was pretty neat.
I have been trying my hand at felting. Felting is where you take little felting needles and stab wool into shapes. I got an idea from Pinterest to use the Altoid box, and made a tiny girl from wool with felting needles. I hand sewed a nighty from sheer material and crocheted a blanket. I stuffed the pillow with a little wool and crocheted around it. Glued fabric to the other side. That other side, though not pictured here, now has a window, a clock made from a button, and dresser to make it look like a bedroom. When I am done with the bedroom side and refining sleeping beauty a little more, I will add another pic.
edit: attached completed project.


My husband calls my crochet, knitting all the time. At first I gave him a pass, but come on. How many times must you correct someone until you finally just let them call it knitting? I’ve reached that point. He likes calling it knitting.


I thought it might be a little fun to try my hand at redoing a shirt with crochet. I’ve seen it around awhile in the blogger sphere and Pinterest, and I have clothes I used to wear when I worked in a professional atmosphere, that I have no need for wearing now that I work from a home office.
Here is my first attempt at prettying up a plain, green blouse.
I cut off the sleeves, keeping the finished seam in tact, cut off the top and put two gathers in the front while gathering the back. I then made a square of four 2-inch squares using #10 crochet thread and a size 1 steel hook and sewed it on. I did not use my sewing machine to do it. I took the blouse off and on to make sure I had the neck and back lines right.
It took minimum sewing and crochet skills while at the same time being a satisfying result.
Below is the square I used. I took off the last few rows because I needed a smaller square.

